VSCodeλ︎
Install VS Code with the VSpaceCode and Calva Extensions
VSCode version 1.79 used in this guide
Install VSCodeλ︎
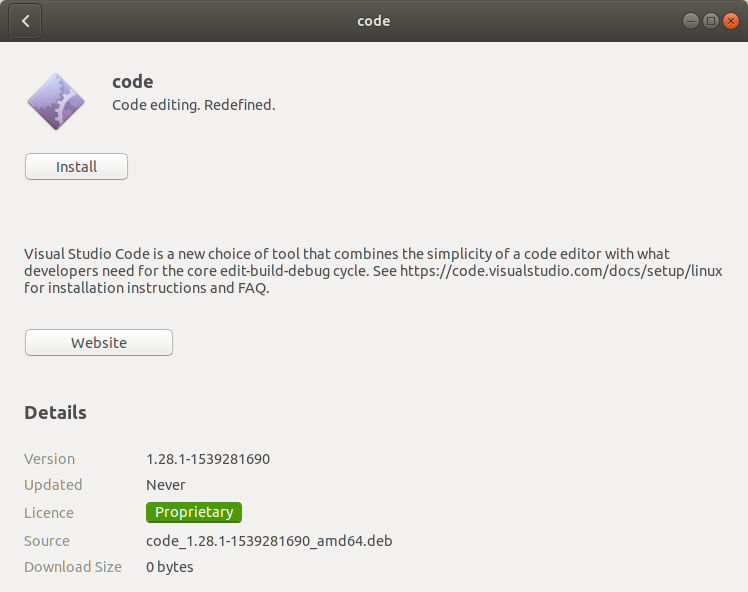
Download the .deb file from VSCode website
Change to the directory the .deb file was downloaded to
Open (double click) the file. The Ubuntu software studio will open. Click the Install button.
Enter your password when prompted to install the software.
Close the Ubuntu Software app once the install has finished.
To run VSCode, press the Super key and type code, or open a terminal and type the command code.
Double-click on the downloaded archive to expand the contents.
Drag Visual Studio Code.app to the Applications folder, making it available in the Launchpad.
Add VS Code to your Dock by right-clicking on the icon and choosing Options, Keep in Dock.
Launch VSCode from the Dock, or in a command line terminal, type code.
Download the Windows Installer
Run the installer which should have a name similar to VSCodeUserSetup-{version}.exe.
VS Code is installed under C:\users\{username}\AppData\Local\Programs\Microsoft VS Code.
VSCode Welcome wizardλ︎
When VSCode is first run the Welcome wizard will display.


Use the wizard to set the default theme


Select Mark Done link to close the wizard.
Practicalli uses the Solarized Light and Dark themes
Ctrl+k Ctrl+T toggles the theme used for VSCode
Calva Extensionλ︎
The Calva extension supports Clojure and ClojureScript development
Ctrl+p to launch VS Code Quick Open, paste the extension install command and press enter.
Select the Extensions icon in the left hand navigation.
Type calva into the search box to list the relevant extension
Click the Install button next to the VSpaceCode extension.


After a few moments the extension will be installed.
Extension install does not require restarting VSCode
VSpaceCode extensionλ︎
Launch VS Code Quick Open (Ctrl+P), paste the following command, and press enter.
Select the Extensions icon in the left hand navigation.
Type vspacecode into the search box to list the relevant extension
Click the Install button next to the VSpaceCode extension.


The VSpaceCode Expanded extension is not used in this guide
After a few momments the extension will show as installed, along with several other extensions that VSpaceCode uses.


Configuration Wizardλ︎
Once the VSpaceCode extension has finished installing, the Getting Started with VSpaceCode page is displayed with a configuration wizard that updates the User settings.json and keybindings.json files.
Select Configure for you button in the Setting up section of the page.


Select Mark Done to close the wizard
Troubleshoot Wizard
If the .config/Code/User/settings.json and .config/Code/User/keybindings.json files are empty then an older version of VSpaceCode may still be configured in the VSCode settings.
Start the configuration wizard using Ctrl+p for the quick open prompt and enter vspacecode
Select Getting Started with VSpaceCode

If the wizard still does not run, quit VSCode and remove $HOME/.vscode and $HOME/.config/Code directories to ensure a clean starting point (backing up the User settings.json and keybindings.json if any useful configurations were added on top of the VSpaceCode configuration).
All extensions must be installed again.
If the wizard keeps failing, use the Manual configuration approach
Manual Configuration
Follow the manual configuration commands if the automatic setup failed or was not followed.
Ctrl+Shift+p to open the VS Code command menu, type vspacecode to narrow the command list and select VSpaceCode: Configure Default Settings and Keybindings.


Save the changes by opening the settings.json and keybindings.json.
Ctrl+Shift+p and searching Preference: Open Settings (JSON) and Preference: Open Keyboard Shortcuts (JSON) in turn. Ctrl+s to save the highlighted file.
Calva Keybinding remapλ︎
Calva extension adds Esc as a keyboard shortcut for clearing evaluation results. This binding breaks vim-style editing in VSpaceCode, so the Calva keyboard shortcut should be remapped.
Ctrl+Shift+p to open the VSCode command menu, type keyboard to narrow the command list and select Preferences: Open keyboard shortcuts (JSON).
Edit the .config/Code/User/keybindings.json file and add the following configuration to remove Esc from the calva.clearInlineResults command and create a new keyboard shortcut for that command using Shift Esc
Add this code before the final closing bracket, }, in the file.
  {
    "key": "escape",
    "command": "-calva.clearInlineResults"
  },
  {
    "key": "shift+escape",
    "command": "calva.clearInlineResults",
    "when": "editorTextFocus && !editorHasMultipleSelections && !editorReadOnly && !hasOtherSuggestions && !suggestWidgetVisible && editorLangId == 'clojure'"
  }
Remap Vim insert mode keybinding to go into normal mode by adding the following to your user settings:
Confirm installationλ︎
To confirm that VSpaceCode is working by opening an editor window.
Select the Explorer Icon in the left hand menu, then select Open Folder...


Open a Clojure project to confirm the Calva and VSpaceCode extension are working (or any text file to test VSpaceCode).
Space should open the VSpaceCode menu in the top center of VSCode.


Calva should show a welcome message

